 Masked Email Manager
How to create a Fastmail Masked Email
Create an address in Fastmail's settings or from Masked Email Manager on your phone. Either way, it appears in the same Fastmail list.
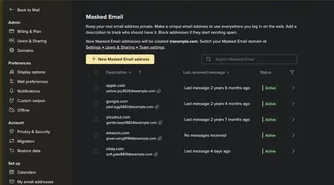
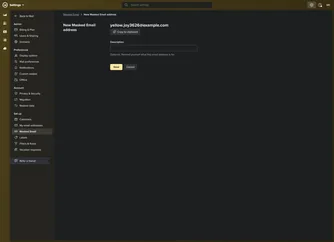
In Fastmail
- Go to Settings, then Privacy & Security, then Masked Email.
- Click New Masked Email address. Fastmail generates one right away.
- Add a description and the site it's for, so the entry means something later.
- Copy the address into the signup form.
1Password can also create an address directly inside a signup form, without a trip to Settings first; Bitwarden generates one from its own menu instead. See the 1Password and Bitwarden guide for connecting either one.
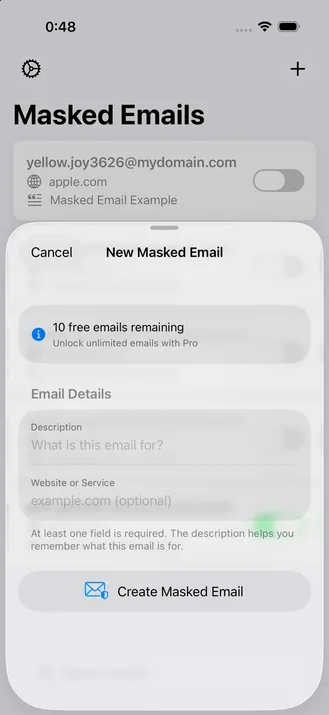
In Masked Email Manager
- Open the app and tap the create button.
- Fill in what the address is for and, optionally, which site or service it's going to.
- Tap Create Masked Email. The address appears at the top of your list, ready to copy.
Set a prefix in Settings and every address the app creates starts with it. That makes those addresses easier to spot in a long list. Leave the prefix blank to use Fastmail's word pairs.
The Full Version adds a Shortcuts action that does the same thing from the home screen or Siri. See the Shortcuts and Siri guide.
No Fastmail API token yet? The token guide covers the one-time setup step the app needs.
Naming addresses well
A year later, the description may be the only useful clue about an address. Use the site name rather than the reason you visited it. "Acme Hardware" will make more sense later than "black Friday order."
Masked Email Manager makes an address from two fields and leaves it on the clipboard, without a trip through Fastmail's settings.